Monday, 2 September 2013

How To Create Farrow and Ball Stripey Chairs

This month, we've been thoroughly inspired by Farrow and Ball's recent brochure cover.


So enthusiastic are we that we've decided to bring you a full tutorial of how to make this charming, slightly shabbied look your own.


You will need:

Wooden Chairs

This is one of those looks that achieves a lot of wow with very little outlay. You get a lot of bang for your buck, as it were. The two sample pots we've chosen are Farrow and Ball India Yellow and Farrow and Ball Blazer and came to a grand total of £7.90. 


Start off by giving each chair a very light sand down. This is because, while we're aiming for a chipped look, it's important to be able to control when and where the paint will flake away. Sanding provides what's called a 'key', which allows the paint to adhere.


Mark off areas to paint using masking tape. On each chair, we created a slightly different effect by masking off different thicknesses of stripes. These are created by simply layering the masking tape strips to block off your desired widths.


Paint the exposed surfaces using one of the sample pots. 


Before the paint is fully dry, remove the masking tape and repeat the process for your second colour. Once the paint has had a chance to set, you can get to work distressing!


Here are three top tips for creating a bespoke time-worn look.

{As always, do contact us for further information. 
We're here to help!}


Don't paint right up to the edges of all the struts. Leave a small gap, then blend in the paint and the bare wood by repeatedly applying, pressing and removing the tape.


Different kinds of tape will pull off varying amounts of paint. Experiment with parcel tape, for example, for a more heavily distressed feel.


And, lastly, vary the stripe width and placement on each chair for a quirky mix and match look.


When you're happy with the level of distressing on each chair, carefully apply clear exterior wood varnish all over the chairs. We used Osmo 410 for a lovely sheen.


...but you can choose from matt or satin varnishes too. 


Enjoy sitting on your stylish new seating arrangement, whilst revelling in the fact that the makeover cost only 
a few pounds!


Enter your email address:

to subscribe to Relics of Witney

Thursday, 1 August 2013

How To Paint A Swedish Style Chair Using Earthborn Paints (Part 2)

In our last post, we took you through the process of how to narrow down the huge amount of inspiration available to help you decide on the final look for your furniture.


 This time, let's focus on HOW to get that look using Earthborn's paint. We'll be walking you through the techniques we used to create our lovely Swedish-style chair.


For the project we're demonstrating, you will need:


The new 750ml size paint pots that Earthborn have released are perfectly suited to this type of small-scale furniture project. We used Nellie, a gentle grey-blue, and Posset, a soft, pure white.


The first step is to sand down your chair to remove any traces of varnish or layers of old paint. If you choose your project with care then this step needn't take too long but, to get a professional finish, it's worth taking the time to do it properly.


Next, apply your paint methodically, on one part of the chair at a time, using simple back-and-forth strokes with your paintbrush to ensure even, smooth coverage.


 This part requires a little bit of thought. Imagine the effect that you would like to end up with, and apply the layers of paint in reverse.


For example, on the main frame of the chair we've simply used Nellie and then sanded gently back in the areas that will receive most wear to reveal touches of the wood underneath.


On the arms and struts, we added a layer of Posset over the top of a dried layer Nellie, so that when we distressed the chair with our sandpaper, we were able to expose hints of the grey paint below.


And, in other places, we rubbed quite firmly with our sandpaper to reveal, not only the Nellie layer, but also the wood beneath.


By painting each part at a time, you'll be able to build up a picture of what you want to achieve more fully, adding more paint here, or sanding a little extra there.


Once you are completely happy with how your chair looks, then apply the protective finish you've chosen. We've used Osmo Polyx Oil Tint for depth and a slight sheen but it's perfectly possible to choose a glossy finish or utterly matte, depending on your preference. Do contact us for advice.


Breathing new life into old pieces of furniture is such a satisfying process. Quite the opposite of high-street buying; you'll end up with a piece that is uniquely yours, which should, by using the right products, last for years and years and years! What could be lovelier?

Enter your email address:

to subscribe to Relics of Witney

Friday, 5 July 2013

Using Earthborn Claypaint For Furniture Painting - Part 1: Inspiration

We love stocking Earthborn paints at Relics of Witney. Their Claypaints, designed to be especially sound for the environment, won the House Beautiful Gold Award for Best Wall-Covering and its easy to see why.


The high clay content in Earthborn's Claypaint ensures a palette that is natural-looking, as well as being beautiful. The new range of 60 colours has been carefully chosen to produce a mellow and luxurious finish.


As long-time fans of Earthborn paints, we were thrilled to learn that Earthborn have introduced a new 750ml tin size, which makes a perfect purchase for furniture-painting.


At Relics of Witney, we never need an excuse to get stuck into painting but we know that, for many of you who long to be able to express your creativity in this way, it can be daunting. Let us take you through the process of how to narrow down the process to produce a piece that you can be really proud of for years to come.

Image via House To Home

Our first tip is to find, and stick to, your inspiration. For the piece we've chosen, which needs simple upholstery, our inspiration came in the form of fabric. The Earthborn Claypaint range complements this material perfectly. You can see how the common thread of clay gives a feeling of harmony to the different paint colours.


Secondly, practice makes perfect so try out your painting technique beforehand. Have a go at different ways of sanding and blending until you find a look you love.


We used a variety of colours to find the shade that best complemented our chosen fabric. If like us, you're a fan of Swedish-style grey-blues, then Earthborn's Nellie is the way to go.


Finally, it's really important to note that your choice of finish can significantly affect the colour of your chosen paint. Here's a board we prepared to demonstrate this:


If you're looking for a finish that simply protects your paint, and enhances its ultra-matt surface, rather than alters its colour, then consider using Osmo Raw Oil. For a muddier look, try Osmo 3062, or Black Bison Paste Wax in Neutral


We love the way Osmo 3040 (top left) gives depth to the Earthborn Claypaint, as well as a subtle sheen. To talk through the benefits of different finishes or technqiues then come into our Relics of Witney shop, or contact us directly. We can help you find a finish which appeals to your personal taste.


Earthborn Claypaints are a real pleasure to work with, and, now, to our delight, thanks to the new 750ml size availability, eminently suitable for painting furniture. The gorgeous gloopiness of the paint means that they adhere extremely well and just cry out for antiquing effects.....But more about that next month, when we'll be talking about our favourite part...let the painting begin!


Enter your email address:

to subscribe to Relics of Witney

Saturday, 1 June 2013

The Top Ten Front Door Colours For Cotswold Stone Houses

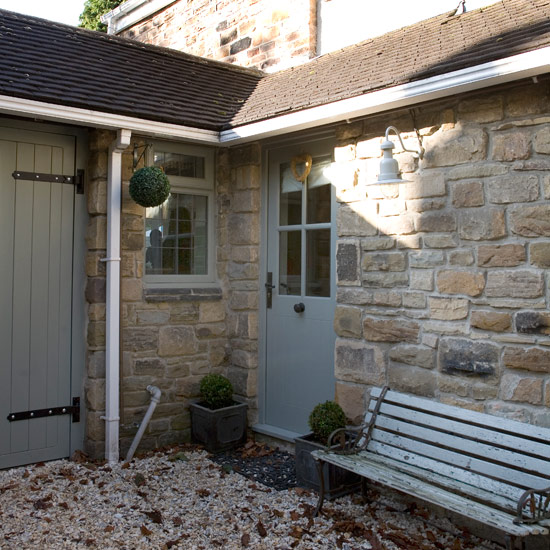
Last month's post covered our general rules for helping you find the finest paint colours for your Cotswold Stone home. This month, we're cutting to the chase, perfect for those of you who are still in a quandary, and sharing our top ten most popular front door paint colours for these beautiful stone houses.


Bathroom


6. BS Lizard. We can easily mix this into Dulux Weathershield for you to give an enduring exterior finish.


P1030167


The paint colours listed in this post, the most popular front door colours we stock, form a perfect blend of muted tones, inspired by nature, which call to mind the relaxed country feel of the Cotswolds. However, our Top Ten would certainly work just as well when combined with painted render, or, indeed, the smart mellow yellow of London brick-stock. Gentle greys, soft putties and cheerful blue-greens will all give you, your families and your visitors the warmest of welcomes!


Images via Modern Country Style, Farrow and Ball, Farrow and Ball, The Vintage Heart, The Cottage Gardener, Dulux, The Paper Mulberry, House To Home, Busy Bee Studios, Farrow and Ball

Enter your email address:

to subscribe to Relics of Witney

LinkWithin