Sunday, 1 February 2015

How To Update Your Kitchen The Easy Way

Let's begin our new kitchen series by easing in gently. When you have neither the time nor the budget to make significant changes, how do you add character to your kitchen? Supposing you're renting, for example, and not allowed to change the wall colour, or the units; where do you go from there?

Lots of frugal ideas for gorgeous open shelving options. Such an easy way to add character in the home!

There is one vital component that can make all the difference: our range of kitchen accessories. At Relics of Witney, we hand-pick only the very best accessories so that you, by selecting those that match your style, can transform your kitchen quickly and easily...which is possibly one of the reasons why we're recommended by Country Living UK on their Pinterest page.

Relics of Witney – 35 Bridge Street, Witney

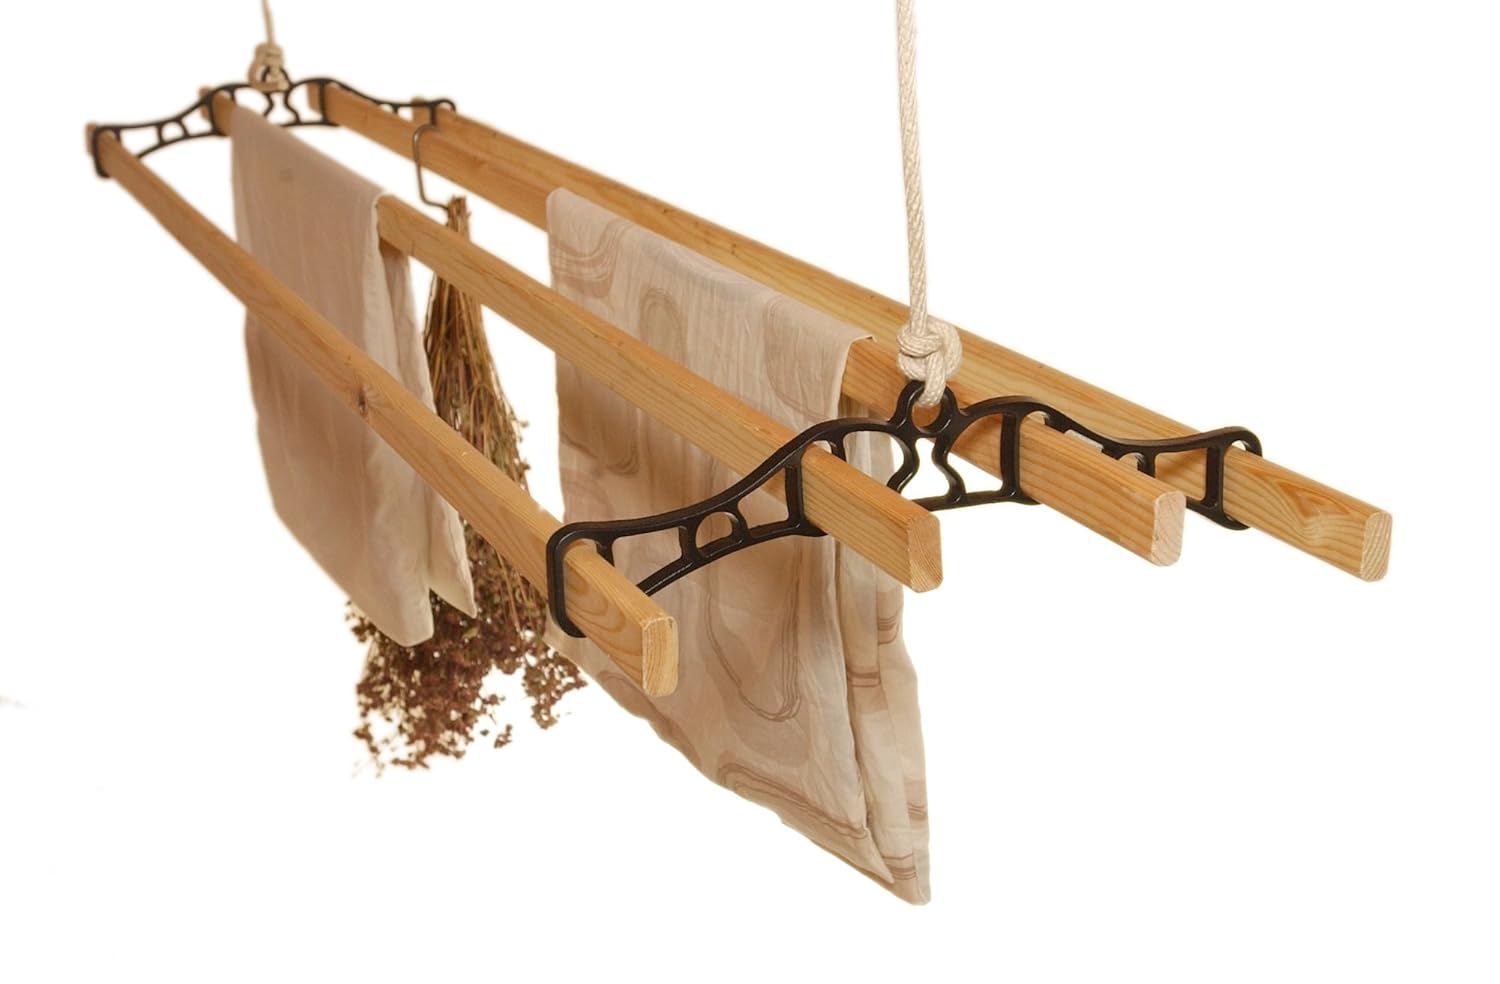
If you've not yet experienced the joy of using our version of the Sheila's Maid then may we urge you to do so without delay?


At only £45, these vintage-style clothes airers with jute cord and cast iron brackets, will create a warm, farmhouse feel at minimal cost.

Very often, rental contracts state that you are in fact allowed to make adjustments so long as they are easily reversible. 


Many tenants don't realise that this can include switching over the handles on your kitchen units.
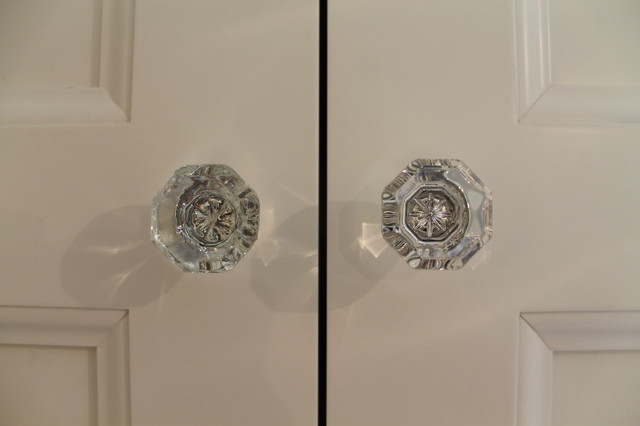

It's surprising what an impact this small step can have. And, don't forget, when you move on, you can take your handles with you, meaning that your money is not wasted. 


With that in mind, we have a whole spectrum of handles for every taste and every budget.


Don't forget the smaller details too. Again, these purchases are pieces that you can take with you. Here are some of our favourites... Our oak string holder is a perfect example of how to make a statement of quality in the little ways.


Our large selection of greyed rattan baskets are ever-popular with our customers, and it's easy to see why. 


Sturdy, durable and stylish, these beauties will make selecting your ingredients a joy! Contact us for more details.


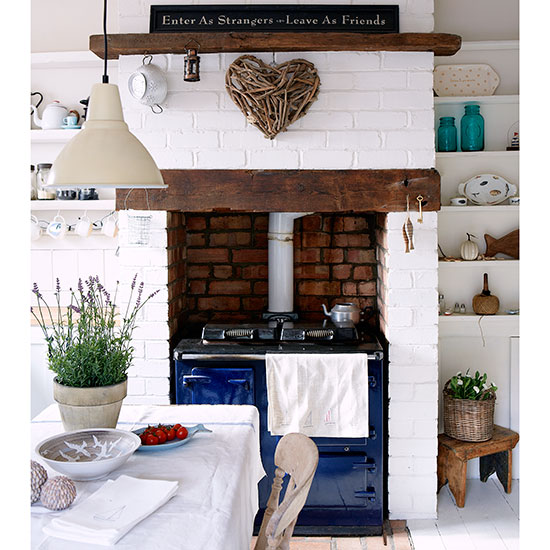
Whilst we love the idea of an old-fashioned roller towel hanging over the AGA rail....


...we're also aware that not many of us have AGAs. We've found a fantastic way to get the look using our oak towel roller. We can also supply especially made towels in blue, red and cream.


We want this series about adding character to your kitchen, to show how even the tiniest details can make a huge difference, even down to this cast iron egg holder...


...but with so many of us wanting to invest more significantly in the heart of the home, next month, we'll be revealing our tried and tested methods for painting your kitchen cabinets.


Images via Country Livng, Relics of Witney, Kitchen Sourcebook, Relics of Witney, andrew carstairs, houzz, ark builders, Relics of Witney,  Relics of Witney,, unknown, East2Eden, The Linen Works, Creamore Mill

Enter your email address:

to subscribe to Relics of Witney

Friday, 2 January 2015

How To Update Your Kitchen

Did you have a wonderful Christmas? We imagine that you, like us, notched up plenty of hours in the kitchen, and so we have a timely new series ahead for you here on the Relics of Witney blog. 

Kitchen range cooker | Lincolnshire bungalow | House tour | Country Homes & Interiors | Housetohome.co.uk

Over the coming months, we'll be looking closely at how you can add considerable character and charm to your kitchen, which can often stay one of the blandest rooms in the home: functional and frumpy is never good.


From the most humble of spaces with barely room to swing a cat to the positively palatial, our kitchen series will show how to:

display your treasures...

`Wood with white. Always a winner in a kitchen. Love the open shelves and breadboards.

create an aged finish to your kitchen table...


add character to your units...

White-washed coastal kitchen | Modern kitchen designs | Livingetc | Housetohome

choose the best accessories...


bring life and pattern to your kitchen....

Messy Cool: 15 Bohemian Kitchens

keep your surfaces in tip-top condition...

vintage Kitchen - I really, really like this! I'd just add my own touches to it :)

pick out the perfect colour scheme...

Debbie from 'Rooms With a View's gorgeous kitchen

Before we begin, though, may we take this opportunity to wish all Relics of Witney customers and followers a very Happy New Year!


Images via: chi, bs2h, ourvintagehomelove, houzz, ideal home, homelife, apartment therapy, indulgy, shabbychic guru


Enter your email address:

to subscribe to Relics of Witney

Monday, 1 December 2014

How To Make Your Own Gilded Wreath!

Welcome to The Relics Festive December Post! 
This year, we're giving you a seasonal tutorial to create a stunning wreath,using variegated leaf to gild, making a beautiful statement on your front door, or as a Christmas table centrepiece.


We stock variegated metal leaf in two forms: loose metal leaf and transfer leaf. Transfer leaf, which we're using today, is easier to work with as the wax-backed paper allows a firmer hold, as well as strengthening the leaf.

Here's how to make yours!

You will need:

One of our vine wreaths
Garden foliage


Select evergreen foliage from your garden or the hedgerow. We've chosen viburnum, but ivy would work just as well. Holly is an option but be warned: it bites! 


Our vine wreaths are like round, plump doughnuts, with plenty of room to build up a layers. Begin by inserting your first stem. 


The stems work best if they are cut to a medium length (about 20 cm) with the leaves stripped from the lower end of each. This means that the bare twig can be inserted into the vine wreath without getting clogged up.


It's a good idea to keep all your stems flowing in the same direction to give the most professional finish. You'll notice that much of the foliage will have a natural bent one way or the other. Make sure that you manipulate the stem so that it bends the same way as the wreath base before insertion.


Keep building layer upon layer until you can't see any more of the vine base, and your wreath has a pleasing fullness.


Working your whole way around the wreath, squeeze your hands gently but firmly over the foliage to make a tighter shape. This helps to calm any wayward tendencies!


Pick out 7 or so new stems to gild. These should have nice big leaves so the gilding shows up really well. Coat each leaf surface with acrylic size. When size is ready, it becomes transparent and has a glossy sheen, whilst still remaining tacky.


Press a sheet of the transfer leaf onto each leaf at a time, using your finger, or a brush to give firm pressure all over. Then peel the wax paper away. This will leave the variegated leaf clinging onto the size.


Check for any areas that need a second (or third...) attempt. The wonderful thing about gilding with this method, is that you can have multiple attempts to get the look you want. Keep going until you are satisfied with the coverage.


Softly rub the gilded surfaces with a brush to remove any loose flakes and apply a thin coat of Liberon's Black Bison Antique Pine wax with a soft cotton cloth to protect the gilded finish. 


This is essential if you're planning to hang your wreath outside. Once the wax has been left for its allotted time, you can buff the waxed surface with a clean cloth. This will bring out a superb lustre to the variegated leaf.


Insert these gilded stems into the wreath, and remove any leaves that are not in tip-top condition.


If you're only just getting the gilding bug then you'll love our Gilding Kit, full of the essentials to get you going, and, at only £14.99 is a huge saving on the sum total.


We hope you love it as much as we do.


Happy Gilding
and

Merry Christmas!


Enter your email address:

to subscribe to Relics of Witney

Monday, 3 November 2014

The Very Best Gilding Craft Projects...

We, at Relics of Witney, are enthralled with the process of gilding. To be able to bring such life, such sparkle, such magic to everyday objects, particularly at this time of year, gives us a special kind of crafty thrill. In this post, we present to you a round-up of the very best gilding craft projects out there, from the easy everyday right through to those festive jaw-droppers that Santa himself would be proud of.

For example, what do you think about this incredible gilded craft: a map art tutorial using gold leaf?

Gilded Map Art (would personally use silver leaf, but the idea is awesome!)

Our gorgeous gold leaf gilded terracotta pots invoked an avalanche of compliments over Christmas last year. Find the full tutorial here. You can find our special variegated leaf here.


...or try this tutorial for another take on gilded terracotta pots...

DIY Gilded Terracotta Pots

A gilded pine cone garland will add more than a touch of rustic luxe this Christmas.


Follow our simple gilded pine cone tutorial using Liberon's Gilt Cream to create one of your own this Christmas.


Find out how to make these beautiful gilded seashells here:

Easy Seashell Craft: How to Make Gilded Seashells with Gold Leaf Paint and Gold Leaf Sheets

These simple but eye-catching pebbles are gilded using gold leaf. The tutorial uses an ingenious method to create really intricate designs using gold leaf.

DIY gold leaf rocks. Perfect combo of nature and sparkle! gilbertDIY.wordpress.com pinterest.com/gilbertDIY

Aren't these gilded gold leaf balloons glorious? We love projects like these that give fantastic results even for beginners.

{how-to | the top six best DIY's of the moment : gold edition}

We found a tutorial for these gilded table numbers here. Wouldn't they be perfect for a wedding?

gilded table numbers diy #diytablenumbers #weddingreception #weddingchicks http://bit.ly/1hIPSXu

As these next projects show, it's possible to gild onto a number of different surfaces, including glass. In this tutorial, Mason Jars are given a new lease of life. Use our gold leaf to get the same effect.

Upgrade your dinner table with gilded DIY vases and votives. Use a foam brush to apply adhesive to the outside of a mason jar in small, irregular patches. When the sticky substance turns clear—in about 30 minutes— press on sheets of gold leaf. Then, rub away excess flecks with a paper towel for a lovely weathered patina.


Stencil How-to: Reverse Stenciling and Gilding on Glass (Going to do this to my kitchen chairs)

For the more adventurous among you, have you considered using gold leaf to gild an entire piece of furniture? This tutorial is fantastic...


Martha Stewart takes through a gilded craft project here, with a step by step guide to gilding a lamp shade.

DIY Gilded Floor Lampshade from Martha Steward : I had no idea how gilding was done. Martha makes it easy.


Find out how to make a gilded letter edge here. This would be a perfect craft project for ultra-smart Christmas cards. See our full range of different coloured leaf for a full range of effects.

how to make a gilded edge envelope - Gold Bow Stationery | Damask Love Blog

If you're itching to get started with gilding projects, then take a look at our Gilding Kit, which includes: 25 sheets of gold leaf, 40ml of acrylic gold size, a small pack of steel wool, gilding base coat and 25ml of antiquing wax. 

At only £14.99, this Gilding Kit is fantastic value for money, and would make a perfect present for the crafters in your life!


And now, it's time for us to get going with Christmas gilding craftproject of our own, which we'll be sharing next month.... 

Enter your email address:

to subscribe to Relics of Witney

LinkWithin